How to Tie an Improved Clinch Knot for Trout Fishing
There's nothing quite as frustrating, or soul-crushing, as feeling that distinctive tug on your line – that unmistakable sign of a beautiful New Mexico trout taking your offering – only for your line to go slack a moment later because your knot failed. It's a common heartbreaker out on the water, from the rushing currents of the San Juan River to the serene waters of a high-country lake. This guide is all about preventing that heartbreak by mastering one of the most reliable and essential knots in any trout angler's arsenal: the improved clinch knot.
Why the Improved Clinch Knot is a Trout Angler's Best Friend in New Mexico
When you're out fishing in the Land of Enchantment, whether you're targeting those feisty wild rainbows in a mountain stream or the robust stocked trout in one of our many beautiful reservoirs, the connection between your line and your hook or lure is absolutely critical. A weak knot is literally the weakest link in your entire setup, and it's where countless stories of "the one that got away" begin. The improved clinch knot isn't just a good knot; for trout fishing, it's often the gold standard, offering a blend of strength and simplicity that makes it perfect for connecting a monofilament or fluorocarbon leader directly to your terminal tackle.
The Importance of a Strong Knot for Delicate Trout
Trout, especially larger ones, have incredibly strong runs and will test your gear to its limits. Imagine you've hooked into a gorgeous brown trout on the Pecos River, and it makes a searing run downstream, trying to bury itself in a log. If your knot isn't tied perfectly, that sudden pressure can cause it to slip or break, leaving you with nothing but a frayed end and a tale of woe. The improved clinch knot, when tied correctly, retains a very high percentage of your line's breaking strength. This means your line itself is more likely to break before the knot gives way, which is exactly what you want. It gives you confidence when fighting a fish, allowing you to apply the necessary pressure without constantly worrying if your connection will hold. This trust in your gear lets you focus on the fight, the beauty of the fish, and the experience itself, rather than fretting about a potential knot failure.
When to Use the Improved Clinch (and When Not To)
The improved clinch knot shines brightest when you're attaching a hook, swivel, snap, or lure directly to the end of your fishing line or leader. For New Mexico trout anglers, this means tying on your favorite tiny nymph, a gleaming spinner, or even a small bait hook. It’s incredibly versatile for both fly fishing (connecting your tippet to a fly) and spin fishing (connecting your monofilament or fluorocarbon to a small lure or hook). It's robust enough for most trout applications and relatively quick to tie once you get the hang of it.
However, it's important to understand its limitations. The improved clinch knot isn't ideal for braided lines, as braid can be slippery and may cut itself when cinched down with this knot. For braid, you'd typically look at knots like the Palomar or the Uni knot. It's also not meant for connecting two lines together, such as tying your main line to a leader – for that, you'd need a different knot like a double Uni or an Albright knot. So, while it's a stellar choice for your terminal tackle, remember it has specific applications where it performs best. Understanding New Mexico Fishing Regulations Overview will often highlight the types of tackle and methods where such knots become crucial.
Understanding Knot Strength and Confidence
Knot strength isn't just a technical specification; it's a huge part of your angling confidence. When you know you've tied a solid, reliable knot, you fish more effectively. You don't hesitate to cast into that tricky spot with submerged timber, or to let a big fish run a bit knowing your gear will hold up. The improved clinch knot, when properly executed, can retain anywhere from 85% to 95% of your line's original breaking strength. That's a huge advantage over a poorly tied knot, which might only hold 50% or less. The "improved" aspect of this knot adds an extra pass through the loop, distributing the stress more evenly and preventing slippage under tension. This small but significant detail is what makes it superior to a standard clinch knot and why so many experienced anglers rely on it for their most important connections. A strong knot empowers you to fight fish harder and land more of them, turning those "almost" moments into successful catches.
Step-by-Step Guide to Tying the Improved Clinch Knot
Tying the improved clinch knot is a skill that comes with practice, like anything else in fishing. Don't get discouraged if your first few attempts look messy. Grab an old hook (or even a paperclip to practice with, to avoid sharp points) and a piece of spare fishing line, and follow along. You'll be tying these confidently in no time, ready for your next trip to Best Places to Fish in New Mexico.
Initial Threading and Twisting
Let's break it down:
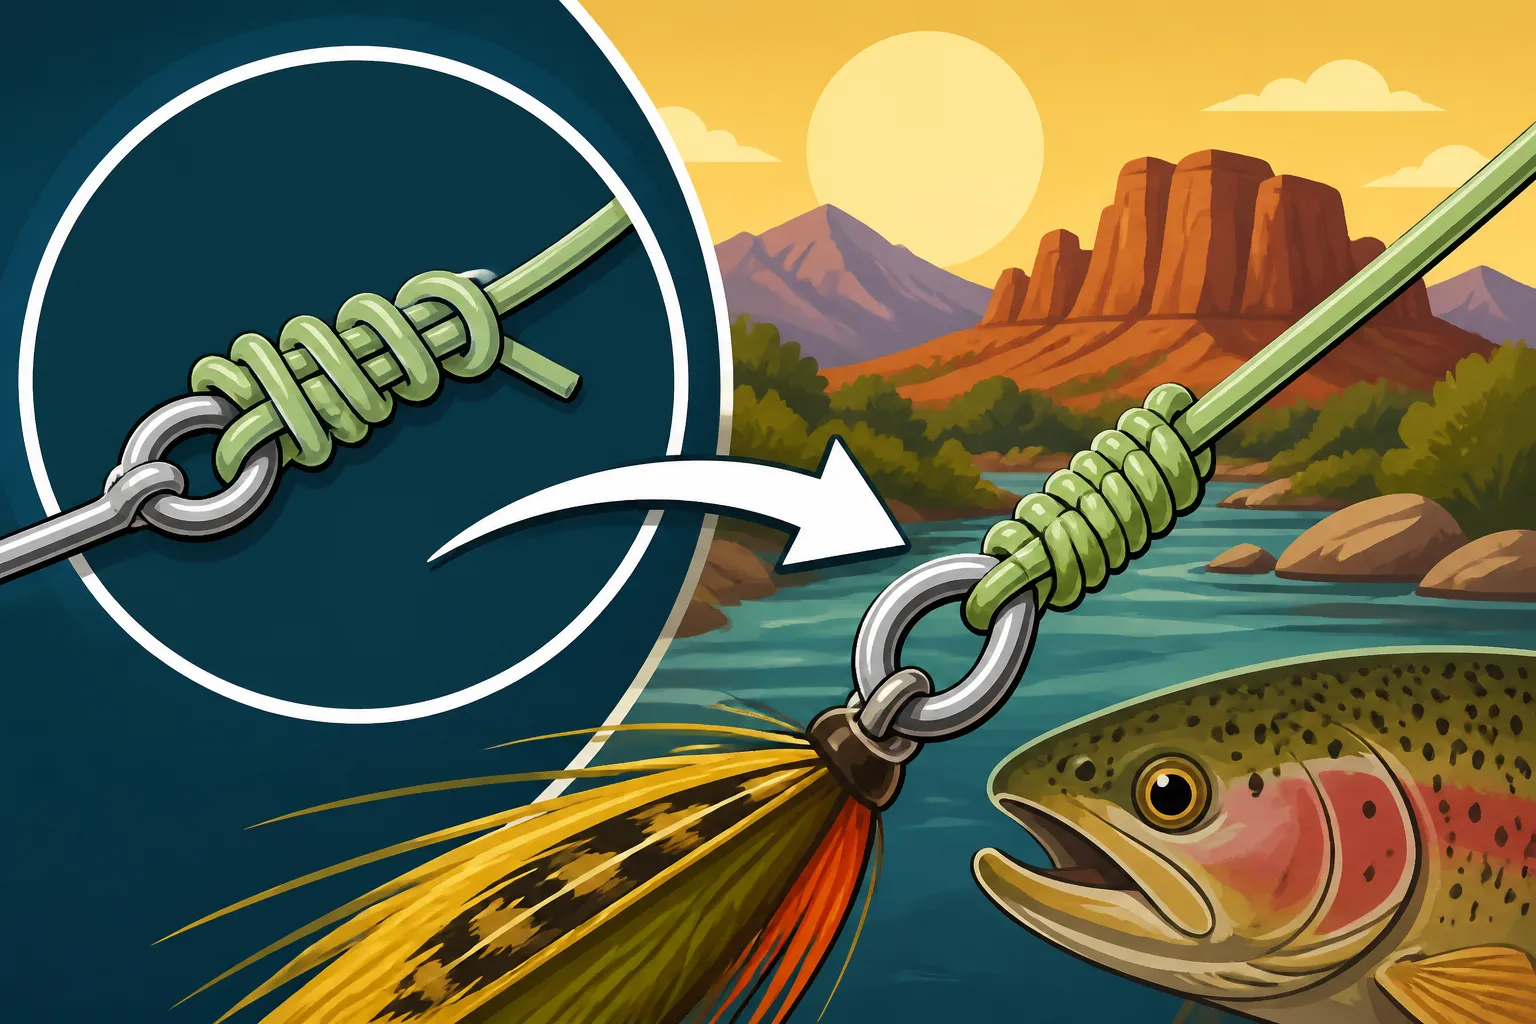
- Pass the Line Through the Eye: Start by threading the end of your fishing line (the tag end) through the eye of your hook, lure, or swivel. Push about six to eight inches of line through the eye. This extra length gives you enough working room to manipulate the knot without fumbling.
- Double Back and Twist: Now, take that tag end and double it back, running it parallel to the main line (the line going back towards your reel). Pinch the two lines together near the eye of the hook. Then, take the tag end and wrap it around the main line. You want to make about five to seven neat, tight wraps. Each wrap should lay cleanly next to the previous one, not overlapping or crossing over. The number of wraps can vary slightly depending on the line's diameter – thinner lines might benefit from more wraps (7-8), while heavier lines can get away with fewer (5-6).
- First Pass Through the Loop: After completing your wraps, you'll notice a small loop formed right above the eye of the hook where you initially doubled the line back. Take the tag end and thread it back through this first loop. Make sure it goes through cleanly. This is the basic clinch knot, but we're going for improved!
The Critical "Improved" Step
This is where the magic happens and what sets the improved clinch apart from its simpler cousin. This extra step adds significant strength and prevents the knot from unraveling under pressure.
- The Second Pass: After you've threaded the tag end through that first loop (the one right above the hook eye), you'll now see a second, larger loop has formed between the first pass and the main line. This is the loop created by the tag end after its first journey through the initial loop.
- Thread it Through the Second Loop: Take the tag end and carefully thread it again through this newly formed, larger second loop. This creates an extra "lock" in the knot, distributing the pressure and making it incredibly secure. This step might feel a little fiddly at first, especially with small flies or hooks, but it's crucial.
- Lubricate the Knot: Before you pull anything tight, it's absolutely vital to lubricate the knot. You can do this by moistening the wraps with saliva (the most common method for anglers) or a bit of water. Lubrication prevents friction heat from weakening your line as the knot cinches down. Without lubrication, the line can get damaged, drastically reducing the knot's strength, even if tied perfectly. This is a step many beginners overlook, but it's essential for maximum knot strength.
Cinched Tight: The Final Pull
You're almost there! This final step involves carefully tightening the knot to create a secure, compact connection.
- Begin to Cinch: With the knot lubricated, slowly and steadily pull on the main line while simultaneously holding the tag end gently. You'll see the wraps begin to snug down against the eye of the hook. Be deliberate and don't yank it too hard at this stage. You want the wraps to seat themselves neatly and tightly.
- Pull Evenly: Once the wraps are nearly snug, pull on both the main line and the tag end, making sure the knot tightens down firmly and evenly against the eye. Then, give a final, firm pull on the main line while holding the hook itself. The knot should be compact, tidy, and cinched tightly against the eye, with no gaps or loose wraps.
- Trim the Tag End: With the knot fully cinched, take a sharp pair of line clippers or scissors and trim the excess tag end. You want to leave a small stub, about 1/8 to 1/4 inch long. Trimming it too short can allow the knot to slip, especially with lighter lines or during a hard fight. Leaving it too long can snag weeds or deter wary fish, especially on New Mexico Special Trout Water Rules. You can find excellent, sharp line clippers on Amazon if you don't already have a reliable pair.
Here's a quick summary table of the key steps:
| Step | Action | Key Detail/Tip |
|---|---|---|
| 1. Thread Eye | Pass ~6-8 inches of line through the hook/lure eye. | Ensure enough tag end for working space. |
| 2. Wrap Main Line | Double back tag end, make 5-7 wraps around the main line. | Wraps should be neat, tight, and not overlapping. More wraps for thinner line. |
| 3. First Loop Pass | Pass tag end back through the first loop formed near the hook eye. | This forms a basic clinch. |
| 4. Second Loop Pass (IMPROVED) | Pass tag end again through the larger second loop created by the first pass. | This is the crucial "improved" step for added strength. |
| 5. Lubricate | Moisten the knot with saliva or water. | CRITICAL! Prevents friction heat from weakening the line. |
| 6. Cinch Tight | Slowly pull main line, then both main line and tag end evenly until knot is snug and compact. | Don't yank. Ensure wraps seat neatly. |
| 7. Trim Tag End | Trim excess tag end, leaving a small stub (1/8 – 1/4 inch). | Don't trim too close, it can cause slippage. |
Common Mistakes and How to Avoid Them
Even seasoned anglers can rush a knot sometimes, leading to a weaker connection. Being aware of the most common pitfalls will help you tie a better, stronger improved clinch knot every time you're out on a New Mexico lake or stream. Pay attention to these details, especially when dealing with the delicate lines often used for Trout Fishing Techniques for New Mexico.
Overlapping Wraps and Weak Points
One of the most frequent mistakes is letting your wraps overlap or cross over each other when you're making those five to seven turns around the main line. When wraps overlap, the pressure isn't distributed evenly, and the knot can "bite" into itself when cinched down. This creates weak points where the line can fray or break under tension. Think of it like a coil spring – you want each coil to sit neatly side-by-side, not on top of each other.
How to avoid this: Take your time. When you're making your wraps, guide the tag end with your thumb and forefinger to ensure each new wrap lays perfectly adjacent to the last one. If they cross, unwind and start that section again. It might add a few seconds to your tying process, but it's far better than losing a trophy fish because of a sloppy knot. Practice in good lighting and without the pressure of a fish biting to build muscle memory.
Forgetting to Lubricate Your Knot
We already touched on this, but it bears repeating because it's such a critical step that's often skipped. When you pull a knot tight, especially with monofilament or fluorocarbon, friction generates heat. This heat can actually weaken the integrity of your fishing line at the molecular level, making it brittle and prone to breaking. It's like bending a paperclip back and forth until it heats up and snaps – the line can suffer similar damage, even if you can't see it immediately.
How to avoid this: Make lubrication a non-negotiable part of your knot-tying routine. Whether it's a quick dab of saliva or dipping the knot in the water before cinching, always moisten the knot. It allows the line to slide smoothly into place, preventing heat buildup and ensuring maximum knot strength. Many experienced anglers carry a small dropper bottle of water with them for this purpose, especially in arid New Mexico climates where your mouth might be dry.
Trimming Too Close or Leaving Too Much Tag
The length of your tag end after trimming might seem like a minor detail, but it plays a role in both the knot's security and your fishing success.
- Trimming Too Close: If you trim the tag end too short – flush with the knot – there's a higher risk of the knot slipping or unraveling, especially with lighter line or if the knot isn't perfectly cinched. A small amount of tag end (1/8 to 1/4 inch) provides a crucial buffer, ensuring the knot can settle and hold without pulling through.
- Leaving Too Much Tag: On the flip side, leaving a long tag end can cause other problems. It can snag on weeds, debris, or even your rod guides during a cast. More importantly, especially in clear, still waters or when fishing for particularly wary trout (like those in New Mexico Quality Waters Program), a long, flapping tag end can be very visible and deter fish from biting.
How to avoid this: Aim for that sweet spot of 1/8 to 1/4 inch. Use sharp clippers that make a clean cut. Dull clippers can fray the line, which itself can be a weak point. Again, a good pair of line clippers, easily found on Amazon, can make all the difference here.
Maintaining Your Knots and Line for New Mexico Trout Success
Learning to tie the improved clinch knot is a fantastic step, but it's part of a larger picture of proper line and knot maintenance that will significantly improve your success rate on New Mexico's waters. From the bustling banks of Elephant Butte Lake Fishing Guide to the serene stretches of the Gila River Fishing, good habits translate to more fish in the net.
Regularly Inspecting Your Line and Knots
Fishing line, especially monofilament and fluorocarbon, can suffer wear and tear from a variety of sources. Casting, retrieving, fighting fish, rubbing against rocks, trees, or even just UV exposure from the intense New Mexico sun can all degrade your line. Your knots, being points of stress, are particularly vulnerable.
What to look for:
- Fraying: If you see any fuzzy, splayed-out fibers near your knot or anywhere on your line, it's a sign of weakness.
- Kinks or Bends: Permanent kinks can indicate structural damage.
- Discoloration: While less common, extreme discoloration could suggest UV damage.
- Rough Spots: Run your fingers gently along your leader and line. Any nicks or rough spots can be a precursor to a break.
- Knot Appearance: A properly tied and cinched knot should look neat, compact, and consistent. If it looks deformed, stretched, or "pulled out," it's probably compromised.
Frequency of inspection: It's a good habit to inspect your line and knots every time you start fishing, and throughout the day, especially after catching a fish, getting snagged, or if you feel a particularly strong pull that might have stressed your line.
When to Retie and Replace Leader Material
Knowing when to retie or replace is just as important as knowing how to tie. Don't be shy about cutting off and re-tying if you have any doubts. That five minutes spent re-tying a fresh, strong knot is worth its weight in gold when the fish of a lifetime strikes.
- After Every Few Fish: For trout fishing, especially with smaller hooks and lighter lines, a good rule of thumb is to retie after every few fish. Each fight stresses the knot, and it's cheap insurance.
- After a Snag: If you've been snagged and had to pull hard to break free, even if the line didn't break at the knot, the stress might have weakened it. Retie immediately.
- Any Sign of Damage: As discussed above, if you see any signs of fraying, kinks, or general wear on your leader or knot, cut it off and retie. It's not worth the risk.
- After a Long Fishing Session: Even if you haven't caught many fish, a full day of casting, retrieving, and general use can weaken your line. Start fresh for your next outing.
- Regular Leader Replacement: Leader material, especially fluorocarbon, can become abraded over time. Depending on how often you fish, consider replacing your entire leader section every few trips or at the beginning of a new season. Check out the guide on New Mexico Fishing License Year Explained to help you remember renewal dates for licenses and align your gear refreshes.
Other Essential Knots for New Mexico Anglers
While the improved clinch is a rockstar for tying on hooks and lures, it's only one tool in a complete angler's knot-tying toolkit. For fishing in New Mexico, especially if you're venturing beyond simple hook-to-line setups, you'll want to master a few others.
- Palomar Knot: Excellent for braided lines and also very strong for monofilament and fluorocarbon. It's often preferred for attaching to swivels or small lures. It's simple, strong, and relatively compact.
- Uni Knot (or Double Uni Knot): The Uni knot is incredibly versatile. You can use a single Uni knot to attach a lure (though it's not quite as strong as an improved clinch or Palomar for direct attachment to terminal tackle). Where it truly shines is as the "Double Uni Knot" for connecting two lines of similar or even slightly dissimilar diameter, like tying your main line to a leader, or a heavier leader to a lighter tippet.
- Arbor Knot: This one is crucial for tying your fishing line to the spool of your reel. It ensures your line is securely fastened before you start winding on hundreds of yards of fresh line.
- Surgeon's Loop: Useful for creating a loop at the end of your leader, which can then be used with a loop-to-loop connection for easy leader changes, or for attaching dropper flies.
- Blood Knot: A classic for joining two lines of similar diameter, particularly popular in fly fishing for building leaders. It creates a very clean, strong, and compact connection.
Learning these knots will give you the confidence and capability to tackle a wider range of fishing scenarios in New Mexico, from chasing trout in pristine mountain streams to battling warm-water species in our larger reservoirs. Practice them at home, so you're not fumbling with cold fingers when the fish are biting!
Disclaimer
This article is for general informational purposes only and does not constitute professional advice. Laws, prices and regulations vary by location and change over time. Consult a qualified professional for guidance on your specific situation.